Solving Word Search Puzzles with Python!
by Nathan Purvis
Background
If you’ve ever read the ‘About’ section of this site, you’ll know at least two things about me - I love puzzles, and I pretty much always have a personal project on the go! Well, I recently decided to couple these two truths and, the result? I built a word search solver using Python!
After wrapping up my previous project on automated bulk-uploading of website sources to Google’s NotebookLM, I knew I wanted to work with Playwright more; I loved how easy it was to handle browser automation tasks. Combined with the fact that I came up with a fairly innovative solution to a similar word grid problem that presented itself on day 4 of last year’s Advent of Code, I knew fairly quickly what I wanted to build!
If you want to skip ahead/not read this at all and dive straight into the code, then you can check out the GitHub repository right here. If not, read on as I dive into a bit of a breakdown of the script and how it works!
Getting ourselves a word search
Given we’re building an automated word search solver, it’s fairly evident we’re going to need a word search! For my project, I chose to use the medium difficulty games on Razzle Puzzles.
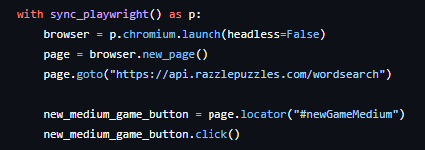
As previously mentioned, I’d been desperate for a chance to work with Playwright again, and this project provided the perfect opportunity to do so. We begin by launching a new browser (with headless mode disabled of course - we want to see it in action!), and navigating to the puzzle page before looking for the button to create a new medium game and clicking this:
Now, in order to get started with solving, there are only two things we need to pull into our script - the grid, and the list of words we need to find. Starting off with the word list, you can see that each word is a set of classes, all sitting under the parent ‘words’ element:

The following section of code ensures that we only select those elements that match all three classes within the ‘words’ container. We count these elements and build a list by looping through each occurrence up to the count:
word_elements = page.locator("#words .word.word-en.word-1")
word_count = word_elements.count()
words = [word_elements.nth(i).inner_text() for i in range(word_count)]
When it comes to the grid, the process is exactly the same. This time we have an outer grid element, containing rows, containing individual cells. Fortunately we don’t actually need to go all the way down to individual cells (yet), as we can just use Playwright’s inner_text() method to extract this from the element. As shown in the screenshot below, these are separated by a linebreak (\n), hence we use replace() to remove this.

grid_element = page.locator("#wordsearchGrid")
rows = grid_element.locator('div[class="row row11"]')
row_count = rows.count()
lines = [rows.nth(t).inner_text().replace("\n", "") for t in range(row_count)]
We can then use the following to turn the whole grid into a single, flattened string, and find its length, which is crucial to how we handle finding our target words.
grid = "".join(lines)
width = int(len(grid) ** (1/2))
The innovative/wacky approach
Now it’s time for that Advent of Code solution I mentioned earlier to come into play! The crux of it is: if we’re looking for words in a grid, we can simply treat this as one, continuous string and use regular expressions to check whether that pattern is present, and, in the case of our word search, where this starts and ends. Our regular expressions are pretty simple searches and the clever part is making subtle adjustments to our offsets, using the grid length. If we take the word BICYCLE for example, this has the following possible patterns:
Horizontal: (BICYCLE)|(ELCYCIB)
Vertical: (B.{10}I.{10}C.{10}Y.{10}C.{10}L.{10}E)|(E.{10}L.{10}C.{10}Y.{10}C.{10}I.{10}B)
Diagonal down & right: (B.{11}I.{11}C.{11}Y.{11}C.{11}L.{11}E)|(E.{11}L.{11}C.{11}Y.{11}C.{11}I.{11}B)
Diagonal down & left: (B.{9}I.{9}C.{9}Y.{9}C.{9}L.{9}E)|(E.{9}L.{9}C.{9}Y.{9}C.{9}I.{9}B)
Horizontal is straightforward i.e. is it the word present either forward or in reverse. However, the others can be a bit trickier to conceptualise, so I’m hoping these incredible sketches (I know, hang them in Le Louvre) can help:


The numbers shown correspond with those in curly brackets above. In regular expressions, a dot (.) represents any character and {n} represents n many times. For instance, in the vertical example we’re checking whether B is followed by n letters, followed by I, followed by n letters, followed by C, and so on…
Now you might be thinking that, to make these expressions, we’d need to know the word list beforehand to manually create the patterns. However, these patterns can actually be created dynamically. That’s where this part of the script comes into play:

Using a nested dictionary, we provide the direction, along with the corresponding step (how far away the letters are from each other) which we use later, and the method for creating the pattern for that direction. Note: word[::-1] is just a way of reversing the word, so it doesn’t matter which way around the word is in terms of how we would read it as humans.
Now we’re all set up with our dictionary, we can simply loop through our word list. For each word, we loop through the directions and check for a match using the corresponding pattern. If one is found, we add 1 to our count for that direction, as well as pulling out the start and end indices of the match, and using these to find the corresponding grid coordinates/positions ready to interact with the browser again - these latter two steps are handled by the helper functions we defined right at the start of the script, which we’ll cover just now.

Key functions
In the previous step I mentioned our functions come into play when a word is found. Those functions look like so:

The first, find_start_and_end_info() takes our regular expression pattern, the grid, current word and step size corresponding to the direction that has triggered the match and does a couple of things. First, it figures out if the word is forwards or backwards in terms of how a human would read the word i.e. whether BICYCLE starts with B or E. If it's forwards, the start index is just where this match starts. If the word is reversed in terms of readability, we know that the ‘start’ of the word is actually the end of where the reverse match was found. Now we know the starting point, we can easily work out the end with some quick maths - use the length of the rest of the word and multiply this by the step size i.e. how far apart the letters are for the direction the match was found in. The result of all of this is two tuples representing the grid co-ordinates of the start and end point of the word i.e. (2,3) and (5,6), which are then passed to our find_page_elements_and_drag() function. Our second function simply takes these two grid co-ordinates, maps them to the corresponding page element and then simulates the action of hovering over word start > mouse down > drag to word end > mouse up, simplified by Playwright’s drag_to() method.
Gathering screenshot evidence
One of Playwright’s features that I hadn’t used before but was really keen to is the ability to grab screenshots of web pages. Given the nature of this project, I knew I wanted some way of evidencing the completed word search puzzles in a way that was more meaningful than some terminal messages. Therefore, I decided to look into this functionality. Following each puzzle completion, a timestamped and numbered image is outputted to a ‘solves/’ directory next to main.py. However, the standard method of screenshotting the entire page didn’t do it for me as there were often advertisements present, or a lot of dead space. Also, the option of focusing on a certain element didn’t fit this use case as I wanted to include both the grid and the word box. Fortunately, one of the keyword arguments (kwargs) in the screenshot() method is clip. Clip allows us to define an area of the page we want to screenshot - perfect!
Setting this area was also a lot easier than expected. From looking at the page we can see that the grid is on top of the word box. We therefore just needed to find the parent elements of these and get the page location of each via the bounding_box() method. Once we’ve grabbed these, we simply take the minimum x and y value of the two to represent the top-left-most point. The other two arguments that clip takes are width and height, which we again infer from the bounding boxes of our two elements. Pretty nifty! The whole process of setting a dynamic screenshot area looks like this:

Which leaves us with some really neat completion images:

Other features
The steps outlined above are the real meat of how the script works. However, there are a couple of additional elements that make it what it is. This project wasn’t created to solve a single word search puzzle, therefore you’ll notice that the bulk of the script is nested within a ‘for puzzle in range(puzzle_n):’ block. After each puzzle is completed and the screenshot is taken, we then check whether it’s the final iteration. If not, we need to find the ‘new game’ button and keep this train rolling!

If you’re wondering about the middle part of this if statement then you’ve got a keen eye and I’ll tell you! When testing - I noticed that after completing the first puzzle, a popup would appear, prompting end-users to download the mobile app. This caused the script to hang and eventually timeout, hence we check for this being visible and hit the close button if so.
Finally, although I said the screenshots were implemented rather than just giving terminal messages, it’s still nice to see some complimentary information whilst our script executes! That’s where these two lines contribute:

Alongside another couple of basic print statements, these help to make up the messages we see during each run:

Final thoughts
This was definitely one of my favourite projects so far. It actually took a lot less time than I expected and was a great example of how we can combine problem-solving with technology. I’m still new to Python and this was a fantastic opportunity to couple learning with something I enjoy - I’d highly recommend finding projects that excite you like I did here as it makes the process so much easier!
Again, you can find the GitHub repo here if you’d like to check it out and even try the script yourself! As usual, if you have any suggestions, feedback, or requests for future content then please do reach out!